Sunday, July 13, 2014

Hidden War Dialer Build: Update

Say hello to my bulky little friend.
This weekend I visited one of my favorite places: SkyCraft in Winter Park, FL. For those not familiar it's an electronics surplus store with all manner of gadgets, old electronics, parts, etc. To be certain it's a Maker heaven and what Tony Stark's trashcan must look like... parts and parts and parts. It has to be seen to truly be understood.

As part of the Back to the Hack series and related to my hidden war dialer project I decided to see if there was a better option to hide my war dialer, Arduino, or Raspberry Pi. In my previous post I said I would use a gutted APC-350 UPS. A trip to SkyCraft and $15 dollars later I found myself with a APC-420. I love how it's well worn, scratched, and has little dents. The device will look like its been tucked away at a target facility for years. It will be a much roomier home for all my hack-a-tronics and will blend into any cube farm, IDF, or MDF perfectly.

After the jump see the tear down and some of my first thoughts heading into the hidden war dialer build.


Doctor, we are going to need to AMPutate. 

The device I purchased was already sans battery which for my use was perfect. I just need a power strip with a place to hide things. There are boards, transformers, and all manner of other stuff that must be removed. Let's get to gut'in.

It's a pretty decently sized beast. You can see it's size using the standard Internet measurement for scale, a banana.


This is where the real goodness happens and why this device is perfect for the task. It will basically function like a power strip once gutted leaving most users unaware of its malicious (Read: Research Project) oriented nature. It will provide power for the electronics on the inside and a network pass-through (either RJ-11 or RJ-45, more on that later).


The inside: Look at that transformer! Just compare it to the banana, it's huge! We are looking at a full partsectomy here.


As if by magic all the parts have been removed. I must advise as not your lawyer or a trained electrician: do not do anything I just did. These devices deal with high voltage and capacitors that may store charge long after the device has been unplugged. Do not open, touch, remove, lick, feed after midnight, bathe, take to prom, share a lease, or perform any other activity not listed by the manufacturer as approved use. Any other use or action could result in a mild to severe case of death. You have been warned.

This part will need to be salvaged. This is the network bypass. The board can be mounted to the case and will leave the outside with a clean professional look. This will also create a connection for the war dialer or can be used later to create a passive network tap.


I may cut it up and then solder wires between the pins. I may get fancy and have a new board custom printed. I'm not sure yet.


The front control panel ribbon connector was directly soldered to the main board. I cut the ribbon leaving the board in place. My intention is drill out or wire in a new LED that lights up when the device is powered. This should simulate what the device looks like when it's in normal operation.


The inside is pretty straight forward as power goes. I should be able to connect these directly to the inbound power and add another outlet on the inside to power my devices.


Here is one of the first problems: the removed main board has the serial port attached. To make this a clean build the serial port hole needs to be filled. Leaving the hole would definitely raise suspicions.


The front bezel leaves an excellent area to hide antennas for WiFi or cellular connections to be included in future builds. Placing any antennas outside the metal box, but covered by the plastic bezel, should work very well.


Gutted and ready to start building! The main concern here will be weight. The device is now very light. Metal plates will need to be added. If someone were to pick up the device after deployment the lack of weight may cause question.


More than enough room for the war dialer or a Raspberry Pi or both!


THERE'S SO MUCH ROOM FOR ACTIVITIES!


Next steps:
  1. Wire a third internal power outlet.
  2. Fabricate either 3D printed mounts for hardware or hand build them.
  3. LED light to fake normal operation of the unit.
  4. Modify RJ-11/RJ-45 bypass for war dialer or Raspberry Pi.
  5. Adjust for the weight of the missing transformer and battery.
  6. Fill in serial hole with a DB-9 serial port.

Thursday, July 10, 2014

Badges, we don't need no stinking badges

Badge blurred for
obvious reasons. It lists my real title as
"Grand Security Bison of the
Loyal Order of the Water Buffalo"
Recently someone pointed out the way I wear my work badge is "unusual". The picture to the left illustrates my particular "style" of wear: no lanyard, clipped to the collar of my shirt. Why do I do this?

This is one of the many ways that I take security seriously as a security professional. If you mind all the small things, like how you wear your badge, often the big things will follow suit.

Just having a badge or access card is "Check box Compliance" as a past manager once told me. Company has photo badges: Check!, No one can see them on their belts: Check!, Lanyard rotates the photo around making the photo useless for identifying someone in a hall: Check!, No one cares if a person walking in the data center doesn't have an ID badge visible: Check! Check box compliance does nothing. Utilizing the tools required by compliance does everything.

ID badges allow for quick identification of individuals and empower anyone in the organization to make a determination if that individual should be in a given area. I prefer wearing my badge this way because it avoids many of the common issues that take a very valuable security tool, like a identification badge, and turns it into one more thing those tinfoil hat wearers in security require that everyone will ignore.

After the jump I will break down my reasons why the way most people wear their ID or access badge defeats the point of the ID in the first place. I will also discuss what you can do to make the ID and access badge process more valuable to securing your organization.


Let's start with this statement: Chances are the way you wear your badge is in direct violation of your corporate security policy. "You have never read my security policy you bald security freak," you may be thinking to yourself. True, but name calling is simply unnecessary. However, I would bet no small amount of money if you work at a company that has combination access card/ID badge system a line exists that reads something like this in your company's security policy:
Identification badges shall be visible at all times to allow for easy identification of all <YourCompanyNameForRealz> employees. <YourCompanyNameForRealz> employees will wear their identification badges at or above above the waist at all times.
This is pretty standard and almost completely ignored everywhere since the beginning of time. I won't lecture on policy violations right now. Instead, let's talk about why how you wear your badge is just as important as the fact that you have one.

1. By clipping my badge to my collar people can feel comfortable looking quickly down from my face to my badge to read my name. This helps foster relationships and is good for security. The best security is accomplished by everyone working together. If you see someone that is out of place in a secure area being able to see their name, report them to security, or simply start a conversation easily to determine if they should be where they are increases the overall security of a location. Placing your badge on your belt means people have to awkwardly gawk at your crotch to try and read your badge. Most people will naturally avoid this. (Most, not all.) If everyone has a badge easily visible the person without one easily stands out and may indicate they are in an area they should not be. 

Such badge. Much ID.
Very Blank. Wow. 
2. Lanyards and retractable badge holders can block badges from view. How many times have you seen someone with a lanyard or belt clip and you can't read their name? The frequency of this occurrence is often proportional to the embarrassment you feel because you need to ask them a question and cannot remember their name. Badge holders that allow the ID to "hide" itself only destroys the value of having ID badges in the first place. Lanyards and retractable holders create an environment where not being able to see identification is acceptable. The clip style badge holder does not rotate and keeps the ID facing forward where it can be easily seen.

3. Lanyards and retractable badge holders often break causing people to loose their badge. Retractable badge holders fall off belts easily. One may find they have been without their badge for hours when it popped off their belt during a walk to the break room. If their badge has access to secured areas someone could find and utilize their access badge before the owner is aware it's missing! Having my badge near my peripheral vision means as I turn my head I am consistently reminded that I have my ID/access badge on my person and in my control. 

4. By wearing my badge near my head it would be very difficult for someone to attempt to grab my badge without me not knowing. A lanyard serves this similar purpose, but suffers from the above mentioned problems. A retractable badge holder on your waist can be easily grabbed or pulled out and the string cut in crowded area without the owner noticing. Wearing my ID badge near my collar means an attacker will need to get very close to attempt to steal my ID/access badge.

Is the way I wear my ID/Access Badge the best way? I think so, but it is not the only way. Consider your organizational needs, how often employees use their badge, and what you really want to get out of a physical access control and ID system. Make sure the corporate policy regarding the display of identification reflects these requirements and then enforce the policy!

The only way to bring value to ID badges and access control is by enforcing policy. Everyone from interns to the CEO must follow policies related to ID badges when inside a company facility. No exceptions. Just like herd immunity policies work best when everyone takes part. If everyone wears their badge and everyone holds others accountable for being able to see proper identification in secured areas spotting an interloper becomes much easier.

Wear your badge where others can easily see it. This one little thing can create a domino effect that makes your entire organization more secure.


Tuesday, July 8, 2014

Fossetcon 2014 - September 11-13th Orlando, FL


 Fossetcon 2014I just bought a ticket to Fossetcon happening September 11-13th, 2014 in Orlando, FL. Fossetcon is the Free and Open Source Expo and Technology Conference.

The three day event includes one full day of training classes, plus lunch during the training day, for $20! I am very excited to see how this goes as it seems like an incredible deal. If you are in Central Florida and like free and open source software check it out. For $20 you can hardly go wrong. http://fossetcon.org/

Sunday, July 6, 2014

Hidden Palm Pilot Wardialing Platform: Part One

While combing through "ye olde box of ancient tech artifacts" I found a Sony Clié Palm Pilot (PEG-N610C circa 2001/2002?). I powered it up to find it still worked like a charm. What to do with this wonderful little piece of tech?

How about a war dialing platform stuffed into a gutted APC battery backup that can be hidden in just about any office anywhere for around $20 USD? Sure. OK!

In part one of this Back to the Hack we will discuss the basic idea for this cheap hidden war dialing platform, its uses, and the goals for the build. In part two we will look at the deployment of this wonderfully ancient little device and what it can be used to discover.

Read more after the jump


Why a wardialer?
Who uses dial-up anymore? Why do we even need a war dialer? Good question, glad you asked. The rumors of telephonic modem connections being dead are greatly exaggerated. Many credit card processing systems still use POTS lines for communication. Alarm systems, multi-function printers (fax, scan, and on-board storage for scanning), Out-of-Band Access to devices, DVRs, and a whole host of other platforms have telephone modem connections. These telephone connections may be used to pivot onto a network via other attached network connections once "dialed in". Often these connections are completely forgotten about. They exist because they always have. Sometimes they were turned on and connected by default when a vendor came onsite to do the original equipment install.

What's the best part about these systems for attackers? They are rarely if ever patched. You show me a small or medium sized business that patched their leased multi-function printer within six months of a patch release (if ever) and I will show you a saber tooth tiger in a kilt making mango smoothies. It just doesn't happen unless something is broken.

Why a Palm Pilot?

Let's look at some of the pros and cons:

Pros
  1. Cheap - You can pick up a Palm III or V for next to nothing. $10 USD or less on eBay
  2. Disposable - See 1.
  3. Self-Contained - Processing, battery, interface all ready to go. 
  4. Available modems for next to nothing that are also battery powered. Again, see eBay.
Could you do this with a Raspberry Pi? Absolutely. However, the Pi modem module, Pi, SD Card, etc, etc. will cost way more than the Palm Pilot. If you are just looking to war dial a old Palm Pilot may be the perfect solution.

Cons
  1. Old software - Availability of software will be somewhat difficult.
  2. Power - Many have a low power capacity meaning long term use will need an available power source.
The Build

The Palm
As previously stated I found a perfectly good Sony Clié Palm Pilot - PEG-N610C in a old box. The Palm was running Palm OS v4. Adding software is very easy on this model as a key differentiator for Sony branded Palm Pilots was a memory stick slot. I didn't even need to load software onto my PC to get new software onto the device. Load software to memory stick, shove in Palm Pilot, done loading software. More on the software later. 

The Modem
What about adding a modem? By a shear stroke of luck I checked eBay and someone had a brand new, never been opened modem for my Clié. My cost was $15 USD. When I received the modem in the mail it felt like opening a time capsule preserved in shrink wrap taking me twelve years into the past. <ConanOBrienVerbratoVoice>IN THE YEAAAAAR TWO-THOUSAND. IN THE YEAR TWO-THOUSSSSSSSAND!</ConanOBrienVerbratoVoice>

I connected the modem to the Clié and it recognized without an issue. 

If you are using a Palm III or V modems can be found on eBay for just a few dollars.

Now we need to look at software.


War Dialing
Joe "Kingpin" Grand still has a link to the old l0pht Heavy Industries war dialing software for Palm online at Grand Idea Studio. The software, TBA, was developed for just this purpose and has all the basic features you would expect from a war dialer: Dialer configuration, scheduled start, dial masking, and output files. If you were looking closely you may have noticed the software was already loaded in the first picture of this post. I downloaded the software to a memory stick and loaded it to my Palm Pilot without issue. Using another Palm device you may need to use the HotSync functions.

Hiding in Plain Sight
I have a APC BE350R battery backup with a battery that is ready to die. This battery backup will be perfect for hiding the Palm Pilot. There are three things that make this device perfect for the task at hand: 

1. After the battery and board are removed the inside can be stuffed with malicious (Read: Legitimate Penetration Testing) tools. 
2. They are ubiquitous in offices. Placed under a desk or behind a cabinet people would never notice the device. Especially when gutted and turned into a power strip with all the close by computer gear plugged into it.
3. It has a telephone pass-through to protect DSL modems. Wiring our war dialer inline with the existing phone system will be all too easy.

When the batteries on these die they are often trashed/recycled/etc. Getting a "dead" one should be a trivial task. Search eBay for "APC 350 no battery". Listings for under $5.00 USD are common.

The Goals
This project has a clear set of goals:
  1. Palm Pilot will be wired into the APC device to continually draw power.
  2. Modem will be wired into the DSL protection ports to create a seamless pass through.
  3. Modem will be protected from DSL and other digital lines via filter.
  4. War dialing routine will be on a schedule (after business hours).
  5. Results will be captured to a text file on the Palm Pilot.
  6. Palm will be configured to email the war dialing results out via a free dial-up service. 
  7. Battery backup should be made to look familiar (Worn, fake asset tags, possibly dusty)
  8. Tamper resistant screw - Placing a tamper resistant screw in the battery bay will discourage curious people.
  9. Device should be cheap - Something that makes this platform appealing is the ability to write it off if "discovered". 
  10. BONUS - Automatic Download of a new dialer configuration based on the previously uploaded results. 
Part Two will focus on the build, prep, deployment, and testing findings of the hidden in plain sight war dialing platform.

Back to The Hack!

Back To The Hack!
One of the areas of security I find interesting is when old hardware/software becomes relevant again. When dusty old devices find new life as security tools after being relegated to the numerous scrap piles of technological progress and dead links of tech reviews years past. Blog posts tagged as Back to the Hack will explore using this old "useless" tech to exploit the modern security controls we rely on today.

Radio Shack DTMF dialer to open door relays? Maybe? What can be done with this old Palm Pilot and modem bought off eBay for a few dollars? Wardialer hidden in a APC batter backup case? Sure! Check out Back to the Hack to see how old tech is breaking new tech, today!

Exploiting Security Cameras with Infrared LEDs - Part One

A few years ago I read a Boing Boing article covering how infrared LEDs could be used to hide the identity of individuals from security cameras. The described method allows one to render their face unrecognizable to many cameras.

This article was written six years ago and as a security professional I couldn't help but wonder, "Have camera manufacturers compensated for this issue since then? Can the cameras that protect the areas and Information Security assets I am charged with guarding be exploited by this type of vulnerability?"

Only one way to find out! Build a test rig, protocol for testing, and test camera that will allow me to evaluate cameras that may be vulnerable to the described exploit. Part One will focus on the build of the testing unit and Part Two will focus on testing and findings. (Including easier ways to perform these tests if you don't want to or can't build a test device yourself. I wanted a permanent tool for testing.)

 
IR based security camera obfusctaor
"Officer, he looked like a
radiant ball of glowing light."


See the build after the break


How does this work? 
Many modern security cameras have cheap infrared light filters or are specifically designed to pick up infrared light. Modern low cost "night vision" security cameras use a technique that floods an area with infrared light and then picks up that light to achieve "night vision". A security camera that has a ring of LEDs around it likely has "night vision". This feature opens these cameras up to being blinded by a strong infrared light pointed back at them. The cameras have no way to differentiate between their "night vision" and infrared light attempting to hide the identity of a individual.

The Build

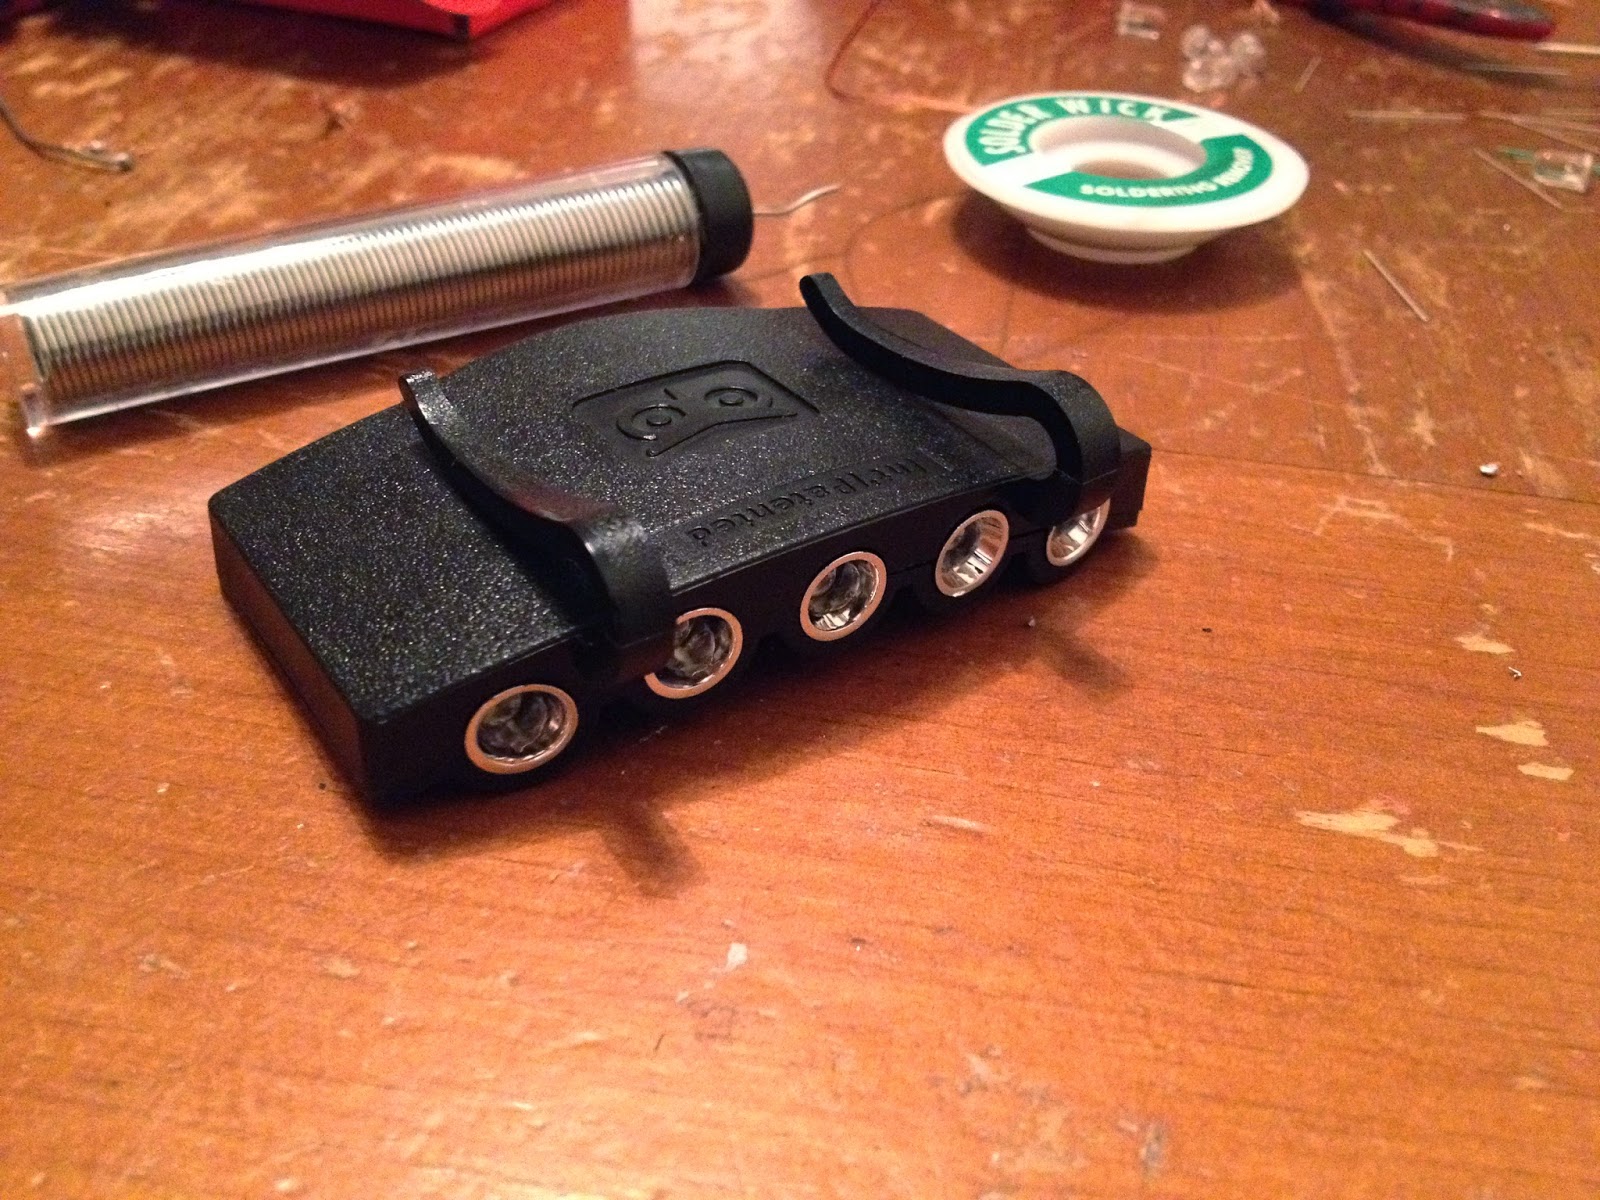
For this build I purchased a 5 LED Cap Light from Harbor Freight for $6.00 USD. This model already has a form factor that attaches to a baseball cap. There are cheaper options on Amazon or other online re-sellers.


LEDs - The most important part of the build. These are 850nm IR LEDs from Sparkfun.com. There are other wavelengths available (specifically 950nm). The 850nm are recommended for this project versus the 950nm as they have a better potential for overwhelming the CCD. The ten pack cost about $12.00 USD with shipping to the United States.


The problem with testing IR LEDs is our stupid human eyes can't see infrared. This is easily overcome with a cheap webcam. The one pictured is a $15.00 USD model. It was buried in the "random electronics I can't throw away because I may be able to hack them up later" box. Turning a old webcam into a IR enabled webcam is pretty straight forward. Open the camera and remove the lens from in front of the CCD. On the back of the lens you are looking for a small square piece of glass. This is the infrared filter. Remove it. You may have to pry it off, it my crack a little, that is OK. (You are wearing eye protection, right? Very good.) You can see the square piece of glass I removed on the silver ring of the outside camera housing in this photo. Your webcam disassembly may very. A better tutorial can be found here.

Now to make sure the camera works. Here you can see me holding an IR LED between my fingers and a CR 2032 coin cell battery. Success! The camera can now see the infrared light.

Now is as good a time as any to talk about resistors. This build has a noticeable lack of resistors. The build uses five LEDs and two CR 2032 coin cell batteries. As such no resistors are needed as it has little chance of burning out the LEDs. If we want more power, we will need resistors. A good resistor tutorial can be found here.

Breaking apart the LED flashlight: There is not much to explain or see here. Gently pry open the case for the flashlight. I used nylon tools for opening an iPod. A butter knife may have the same result with more marring of the plastic.


A close up of the work area. I need to remove the regular boring LEDs and replace them with the new, sexy, IR LEDs.


IR LEDs coming out. Helping hands do your thing. Desoldering components is not incredibly easy, nor is it impossible. Solderwick can be used for the task or a desoldering pump. This two minute tutorial will give you some of the basics.


New LEDs going in. A solder wizard I am not, but I get the job done. These are some fairly small pads to solder. In the end, I am pleased with the result. If you have never soldered before check out Sparkfun's basic guide to through hole soldering.


New IR LEDs in and ready for assembly.


All put back together and ready for testing.


Face without IR Camera Obfuscator.


Face with IR Camera Obfuscator.


Ready for real world testing.

Part two will evaluate:
  • How well the devices works against specific camera models.
  • Alternate testing methods.
  • Improvements to the test model.